The secret sauce of an engaging social media profile is made up of many things, but an interesting post that adds some value to the audience’s demands is one of the main ingredients.

We all want to make our social media posts as interesting as possible. And thankfully, today’s social media platforms provide us with most of the tools we need to customize our posts according to our preferences. A wide array of customization features are available that make our posts beautiful, attractive, and enjoyable to read, view, and watch.
While there are many ways to make your posts more engaging and interactive, some features can help give your post a more personalized touch. The Add Location option is one such feature that allows us to add a location to our Instagram posts.
The Add Location option can not only tell the audience about where you are or from where you have shared the post. Using the feature correctly can help your audience relate and connect better to what you have shared in the post.
But what if you want to add a location that isn’t available on Instagram? Can you create a custom location for your Instagram posts? Let’s find that out.
How to Create a Location on Instagram
Since Instagram and Facebook are sister companies under the same umbrella of Meta, the two work surprisingly in sync with each other. If you want to add a new location on Instagram posts, you need to add that location on Facebook.
Step 1: Link your Facebook and Instagram accounts
This is the trick. You need to link your two accounts from the Accounts Centre. Since the two platforms are sister companies under the parent company Meta, they already work in sync with each other. And linking your Facebook and Instagram accounts enhances this synchronization in many ways.
Once you link your Facebook and Instagram accounts, you can upload the same posts on both platforms, which will help us achieve our objective of adding the location to our Instagram posts.
Confused? Just keep reading.
Step 1: First, make sure you have Facebook and Instagram installed on your phone. Log into your respective accounts on the two platforms.
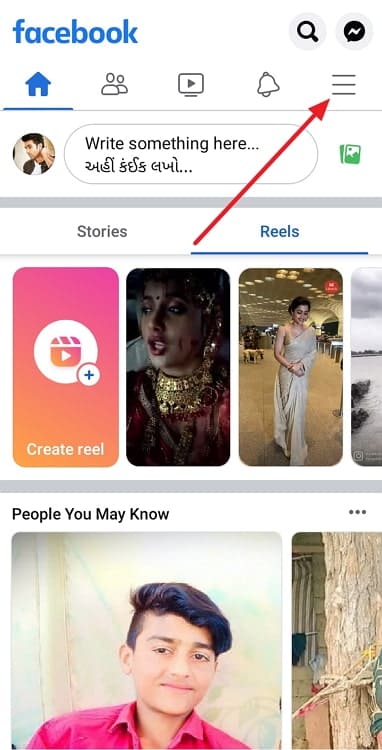
Step 2: Open the Facebook app.
Step 3: Go to the Menu tab by tapping on the three parallel lines at the top-right corner.
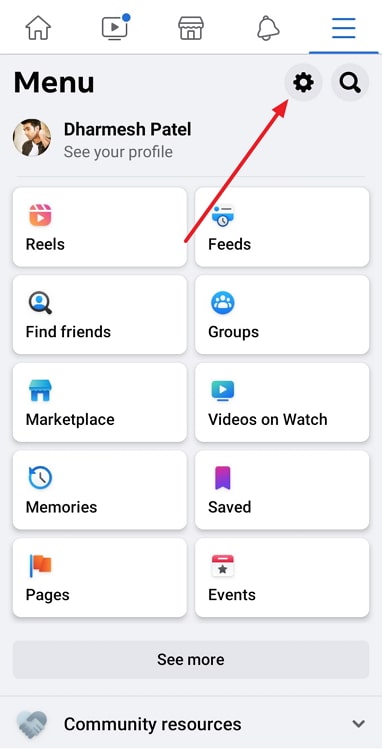
Step 4: Tap on the Settings gear icon near the top of the Menu page, towards the right.
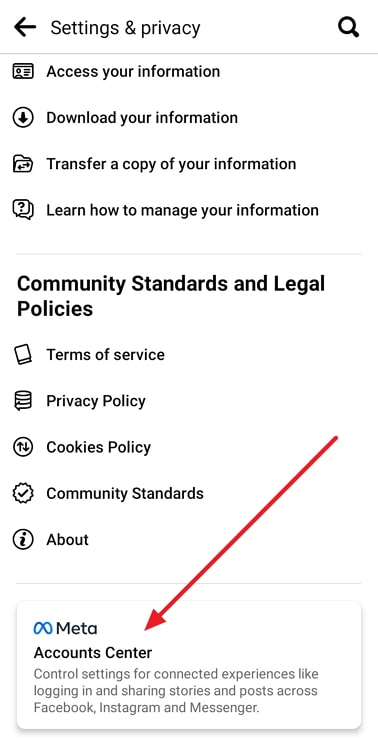
Step 5: Scroll down to the bottom of the Settings page and tap on Accounts Centre.
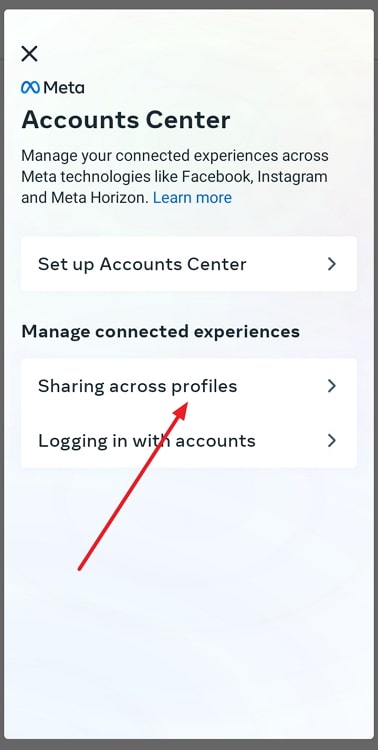
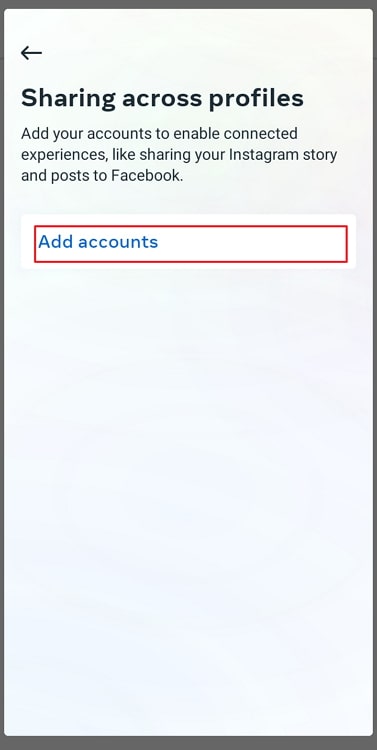
Step 6: On the Accounts Centre page, tap on Sharing across profiles under the section Manage connected experiences.
Step 7: Tap on Add Accounts.
Step 8: On the next screen, you will see your currently logged-in Facebook and Instagram accounts. Tap on Continue to link these accounts.
Step 9: Finally, tap on Yes, Finish Setup to finish linking the accounts.
Step 2: Share a Facebook post with a custom location:
Now that you have connected your accounts, it’s time to use Facebook to share a post with your custom location. Since your Instagram account is linked to Facebook, you will have the option to share the post on Instagram.
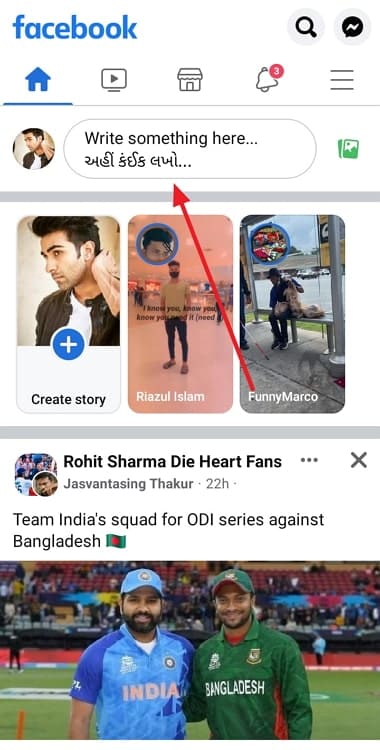
Step 1: Go to the Home tab of Facebook and tap on the area at the top that says Write something here.
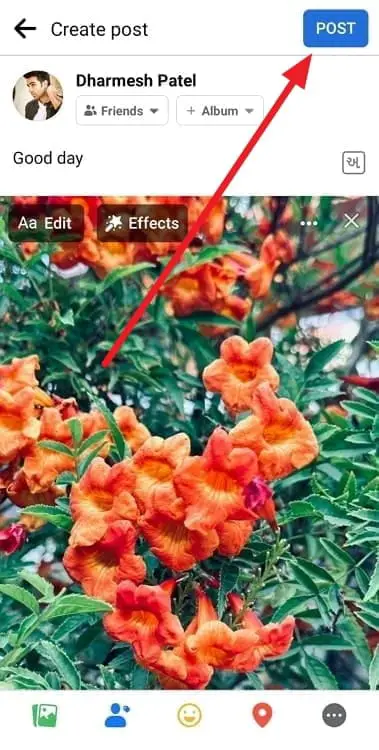
Step 2: On the next screen, you will see your name at the top and a few options just below it. A small icon on Instagram will also appear there with the Off status. Tap on it and enable Sharing to Instagram.
Step 3: Now, add the photo or video you want to upload as an Instagram post. You can also add any caption you want to post.

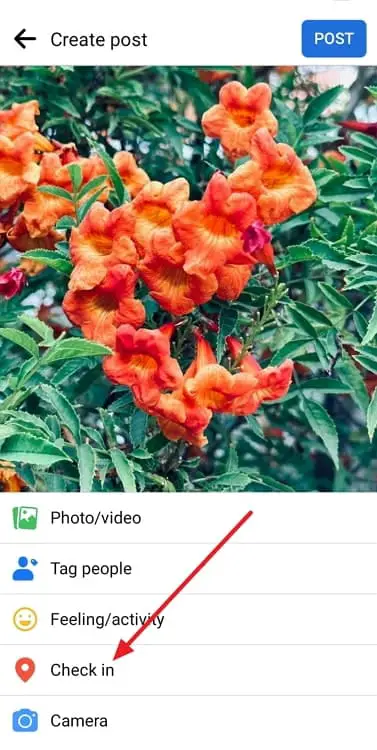
Step 4: After adding all the photos, videos, and text, tap on the Check In icon– a red-colored pin (similar to the one you see on Google Maps).
Step 5: You will see several location suggestions based on your current location. Scroll down through the bottom of the list and select Add a new place.
Step 6: Enter the name of the place you want. Enter the address and town/city if you want. Tap on Map location to locate the place on the map.
Step 7: After entering the details, tap on Save Custom Place.
Step 8: Hit the Post button at the top-right corner.
Other than being shared on Facebook, the post will also be shared on Instagram and will be visible to everyone if your account is public and your followers if your account is private.
PRO TIP: If you don’t want to share the post on Facebook, you can change the audience of your Facebook post to Only Me while uploading the post. The visibility of your Instagram post will remain unaffected. You can also delete the Facebook post later if you wish.
Closing thoughts
Locations are an interesting feature on Facebook as they can help you make your posts more interesting and relevant. And Facebook also allows us to add our own custom location on their platform, making everything more interesting.
However, Instagram doesn’t let you add their custom location on the app, although they allow them to add the location from the list. In this blog, we have discussed a hidden method to help you add a custom location to your Instagram posts using the Facebook app and the Accounts Centre.
Try out the method and tell us what you think about it. If you like this blog, don’t forget to share it with other Instagrammers.
Also Read:


 Bitcoin
  Ethereum
  Tether
  XRP
XRP  BNB
BNB  USDC
USDC  Solana
  TRON
TRON  Figure Heloc